It is Easy with Stickers

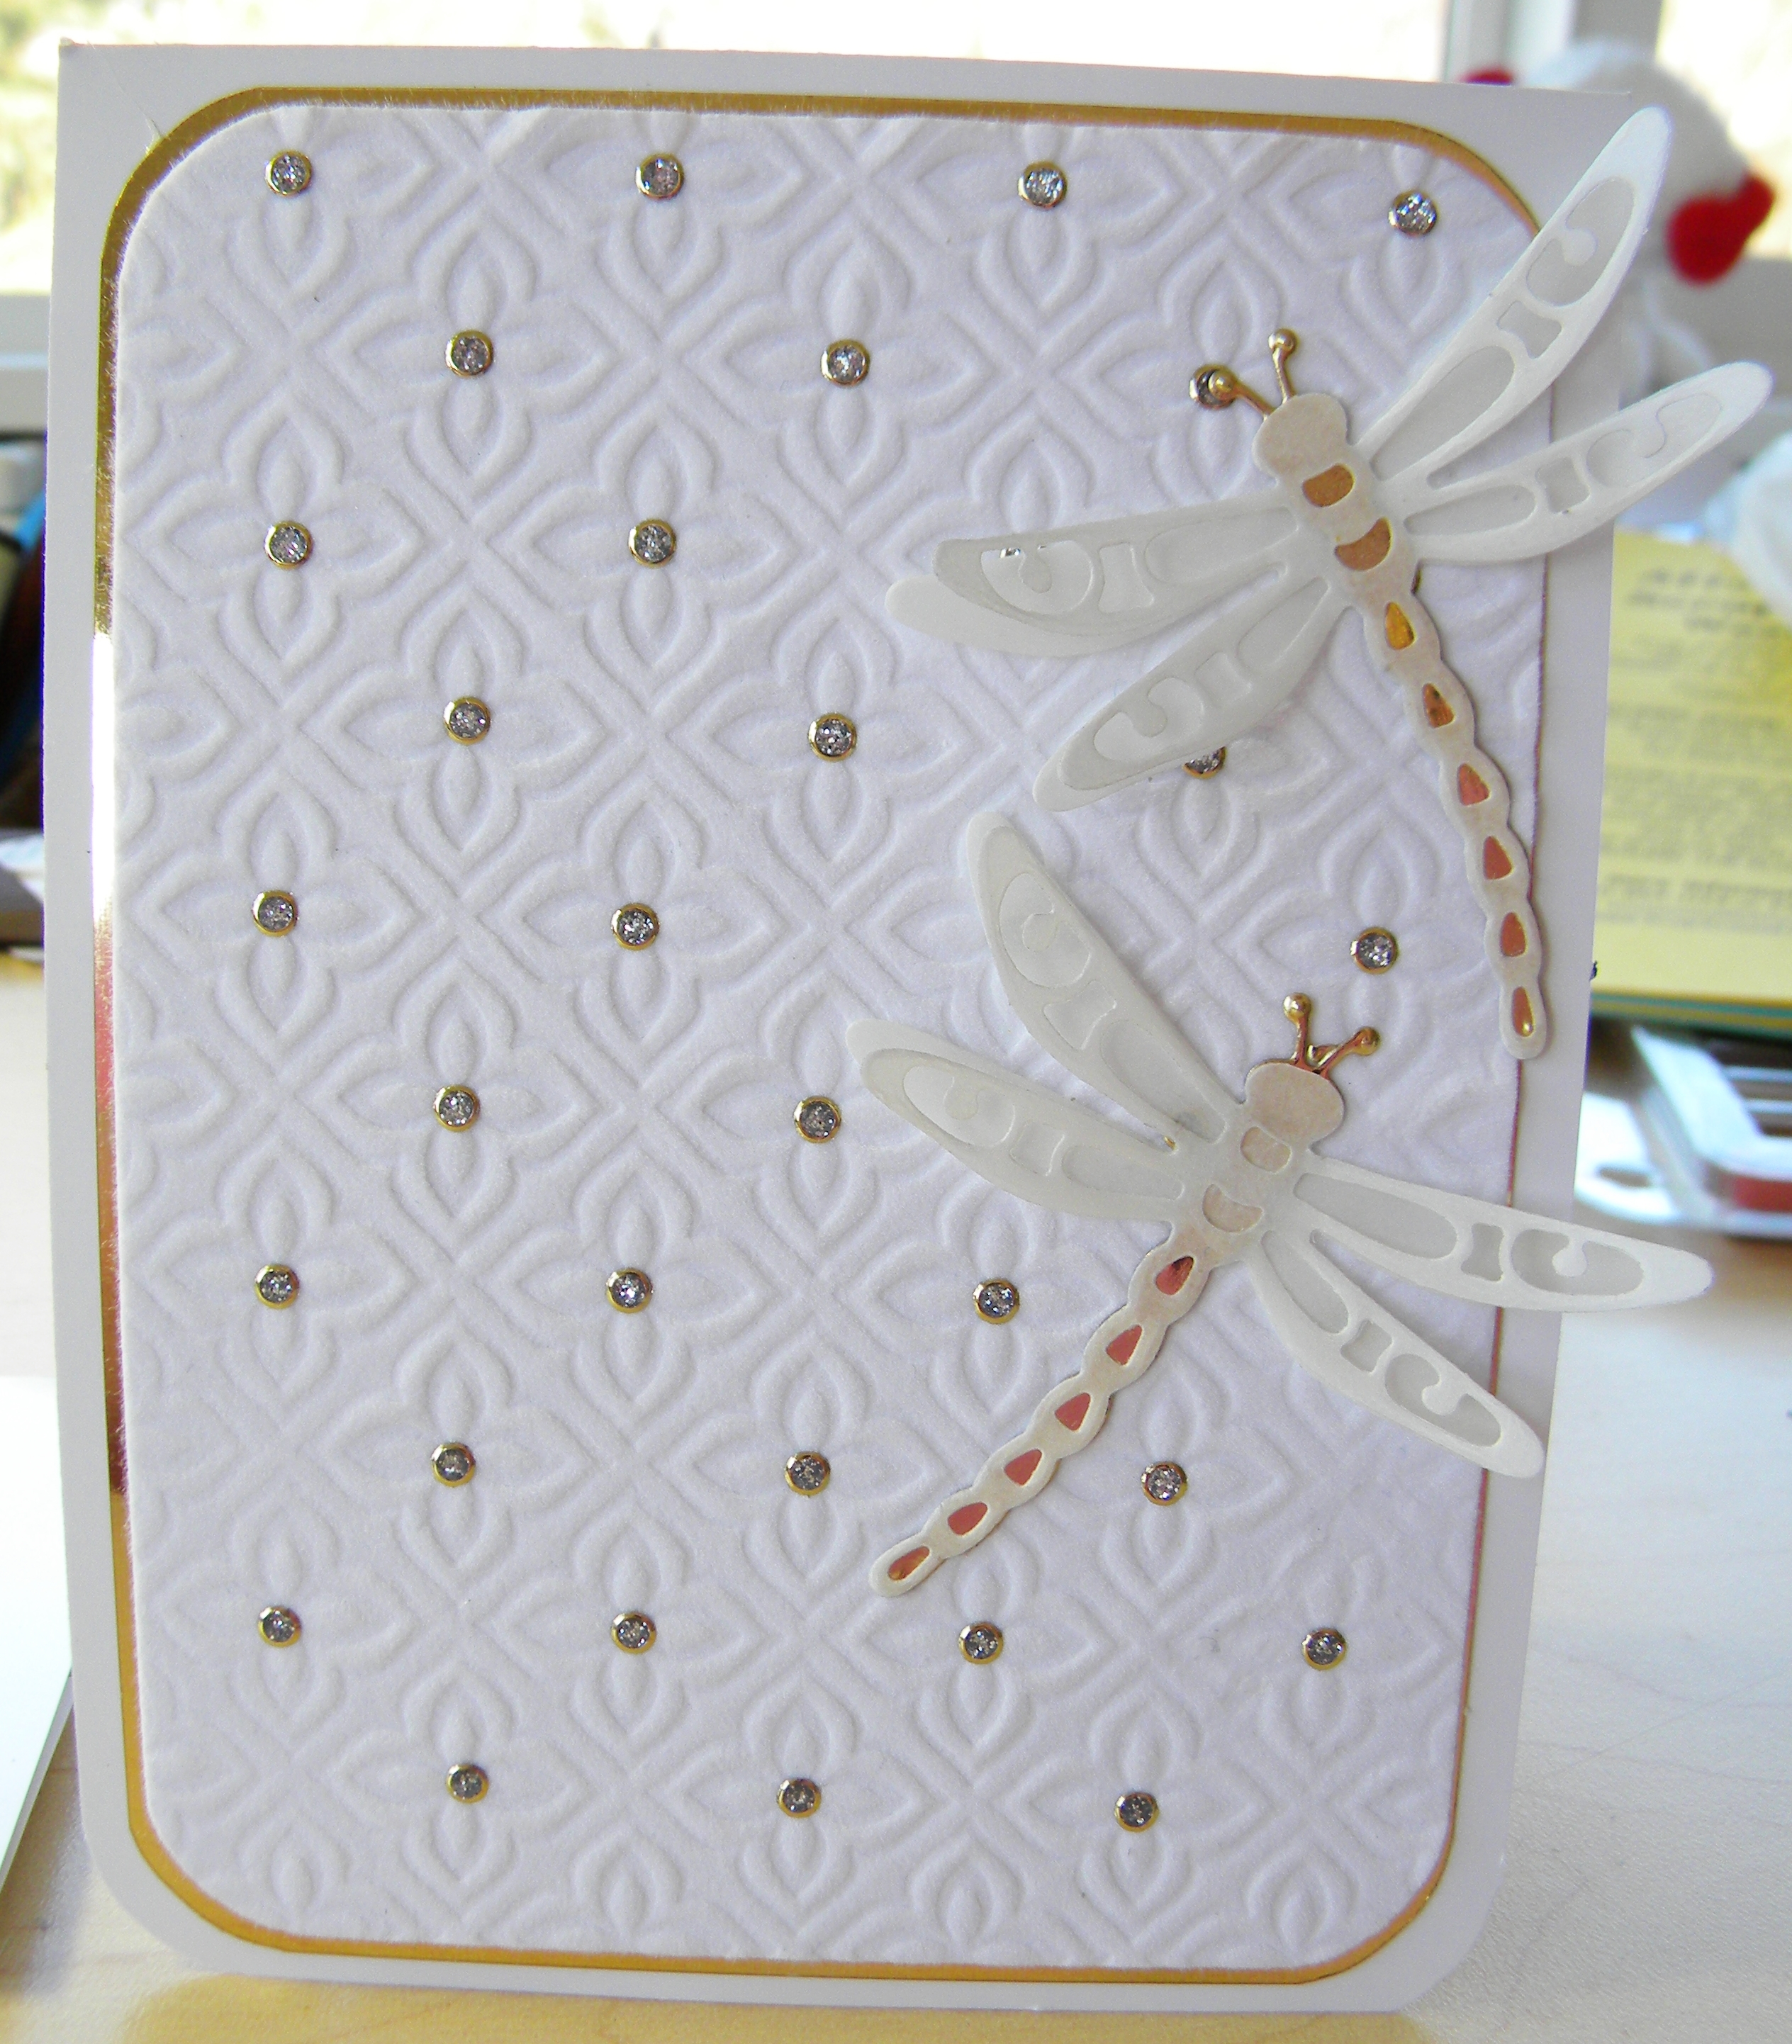
Every time I use Peel-Off Stickers and Silk Microfine Glitter from Elizabeth Craft Designs, people fall in love with my cards. It’s a fun and simple technique that provides big rewards. My husband, who had never crafted before a friend dared him, loves it and colors whenever the booth is slow or someone wants a demo.

The greatest thing about it is the glitter stays put, so the recipient does not receive an envelope full of glitter. You can even put it in your scrapbook and not get a puddle of glitter at the bottom of your page protector.


The technique is really simple and you need just a few products.

  1. Cut a piece of white cardstock slightly larger than your outline sticker.
  2. Cut a piece of Elizabeth Craft Designs’ Clear Double Sided Adhesive the same size as the cardstock. NOTE: This is exceptional adhesive. Once your glitter, sequins or whatever you need to stick is stuck, it isn’t coming off. This also means you should move it out of your way so you don’t accidentally pick it up with your elbow.
  3. Adhere the adhesive to the cardstock and set it aside.
  4. Place the release sheet (or backing) off of the adhesive in front of you, upside down (the blue ECD logo should be face down on the table).
  5. Carefully peel off your sticker and lay it upside down on the release sheet (sticky side up).
  6. Make sure it is positioned how you like and that there are no “hitchhiker” pieces still attached. Licking your finger helps if the sticker sticks to your finger. Tweezers also come in handy for this process.
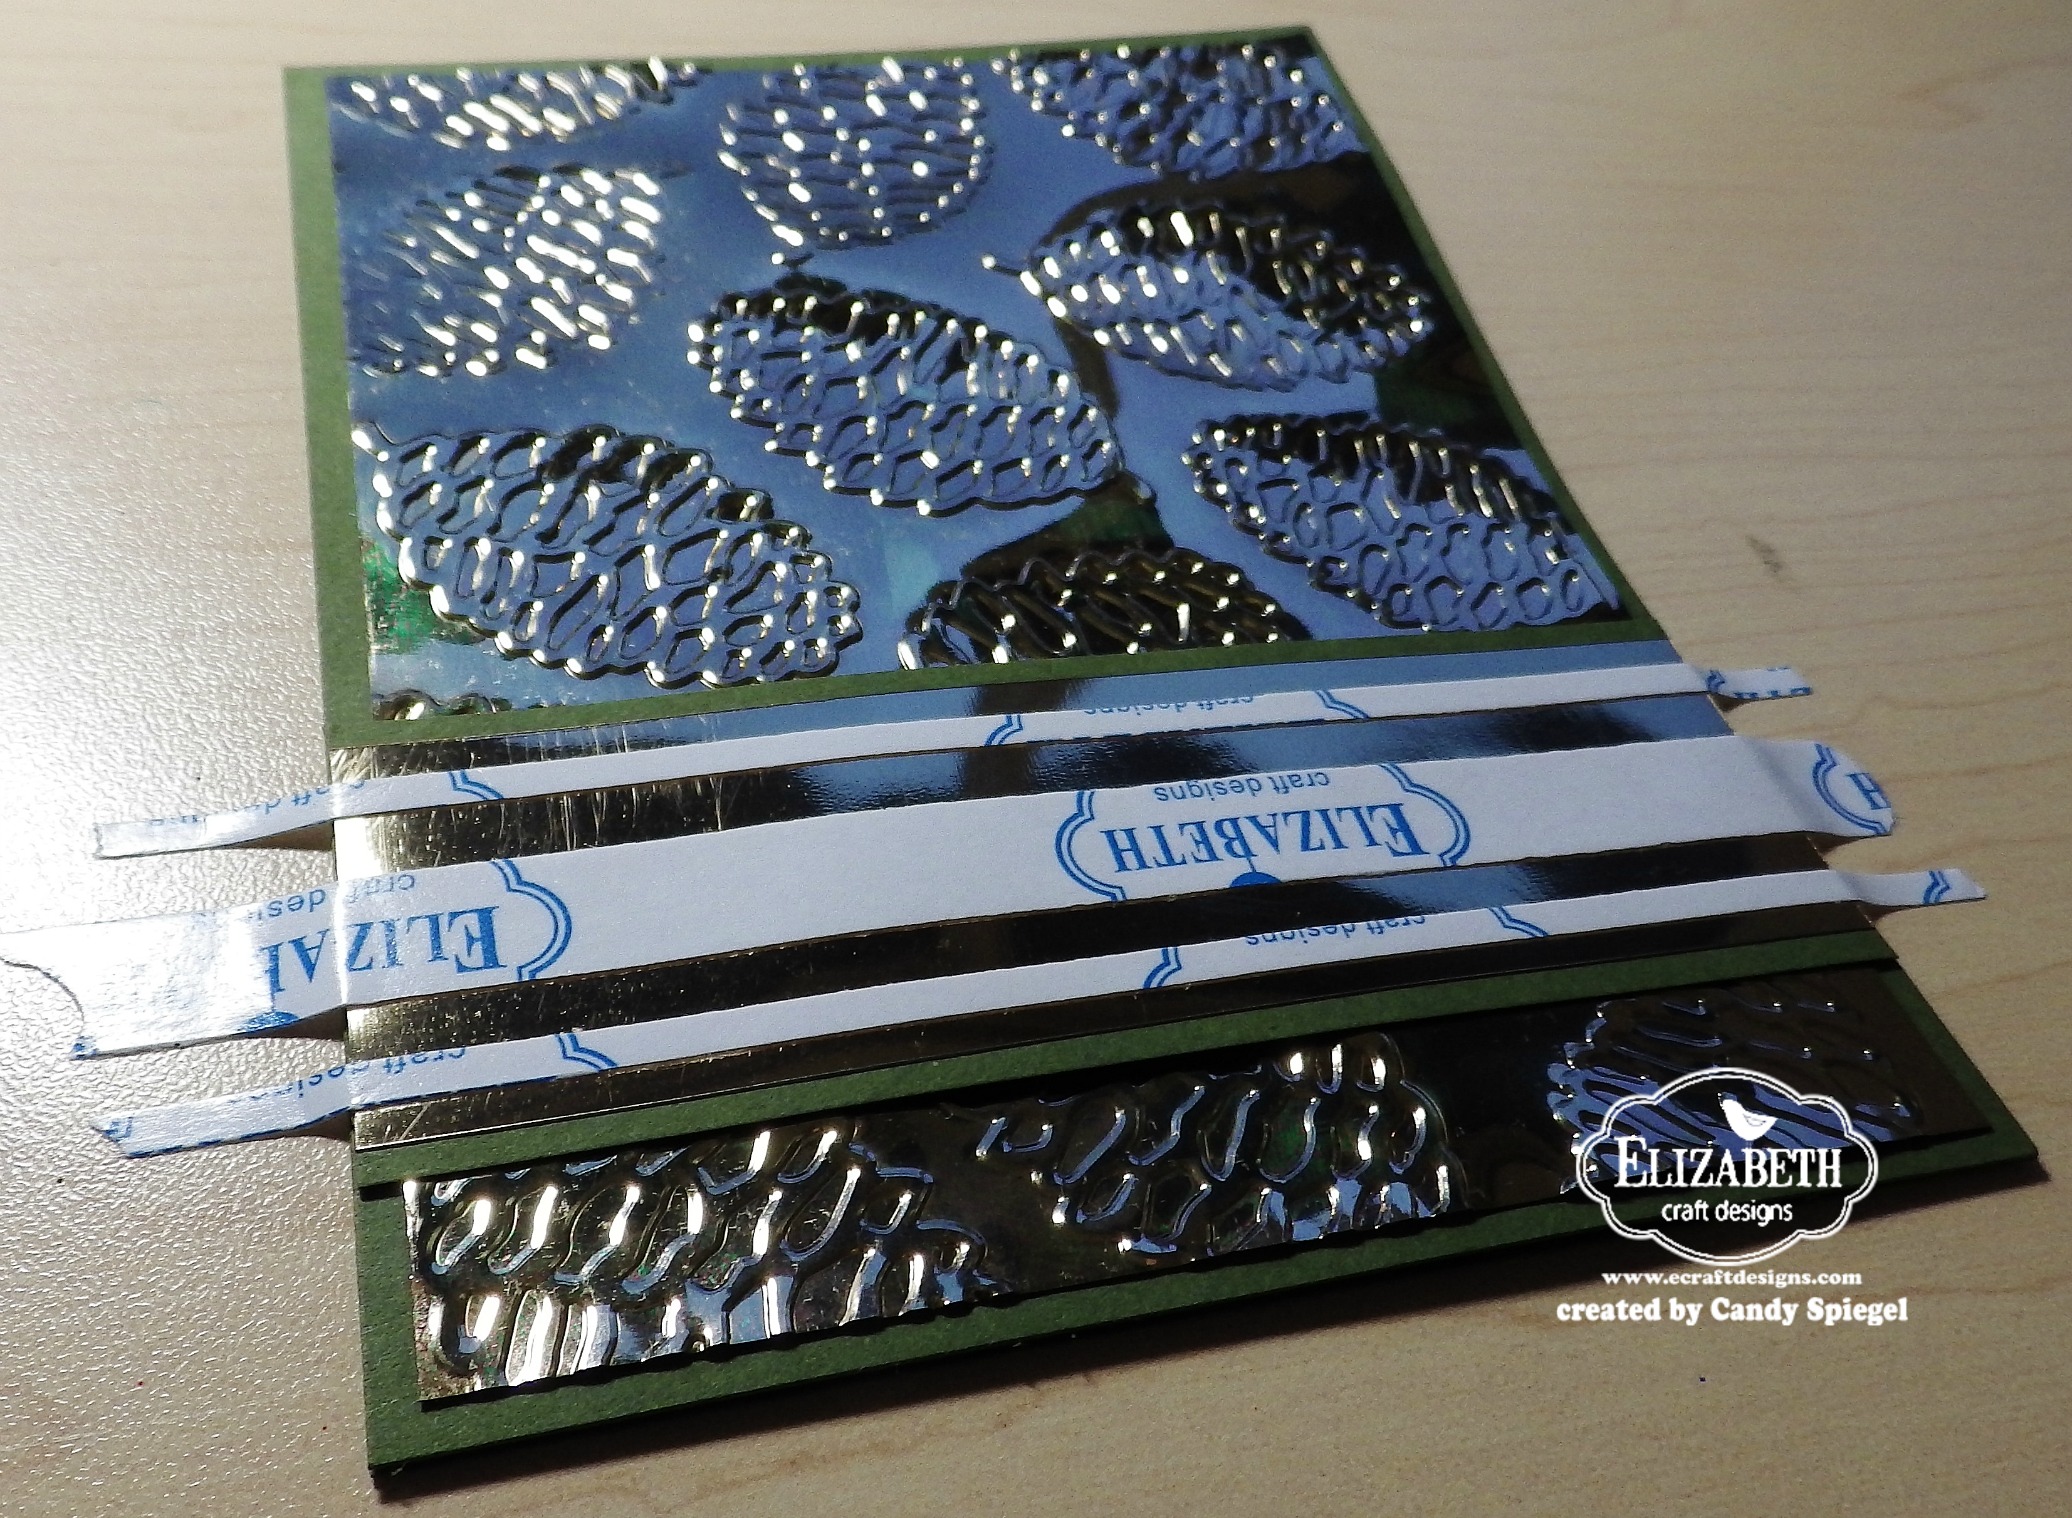
  7. Take the cardstock with the adhesive on it and pull the other release sheet off (if still attached).
  8. Lay it sticky side down on top of the sticker on the release sheet. Flip it over and remove the release sheet again.
  9. Coat the sticky liberally with Elizabeth Craft Designs’ Silk Microfine Glitter in either Warm Diamond or Cool Diamond. NOTE: These are the only glitters I know of you can color on safely. Do not try this with traditional glitters.
  10. Tap off the excess and polish it. You will see the sparkles intensify as it cements the glitter into the adhesive. This is the secret to it never coming off! If you find spots that are still sticky, add more glitter.
  11. Grab an alcohol ink marker, like Copic or Colorista, and color away. Some water-based markers also work, but you need to let them dry overnight. If any glitter comes off on your pen, you need to stop and polish harder.
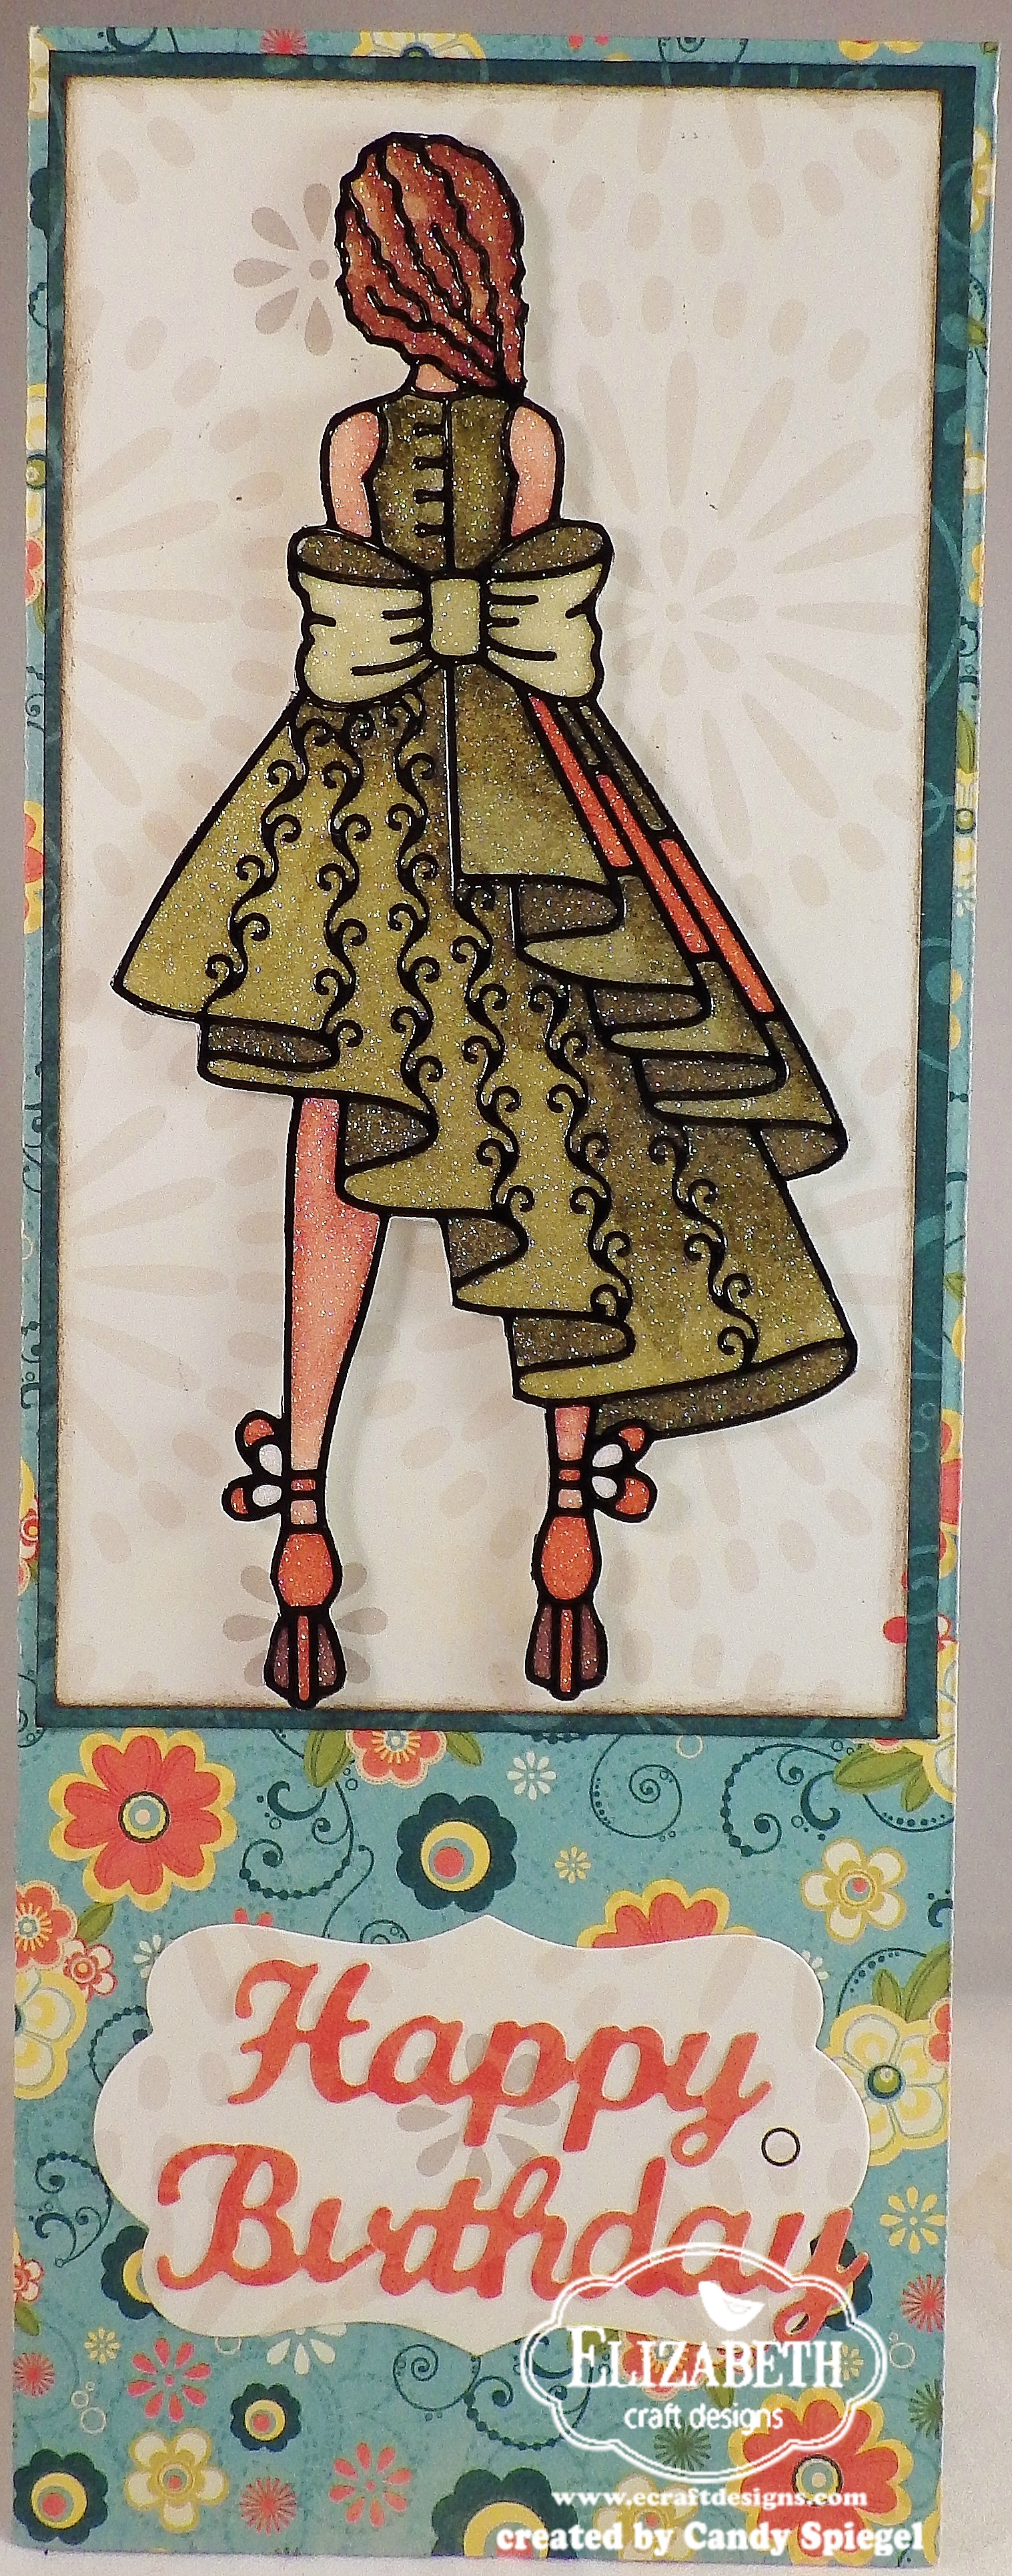
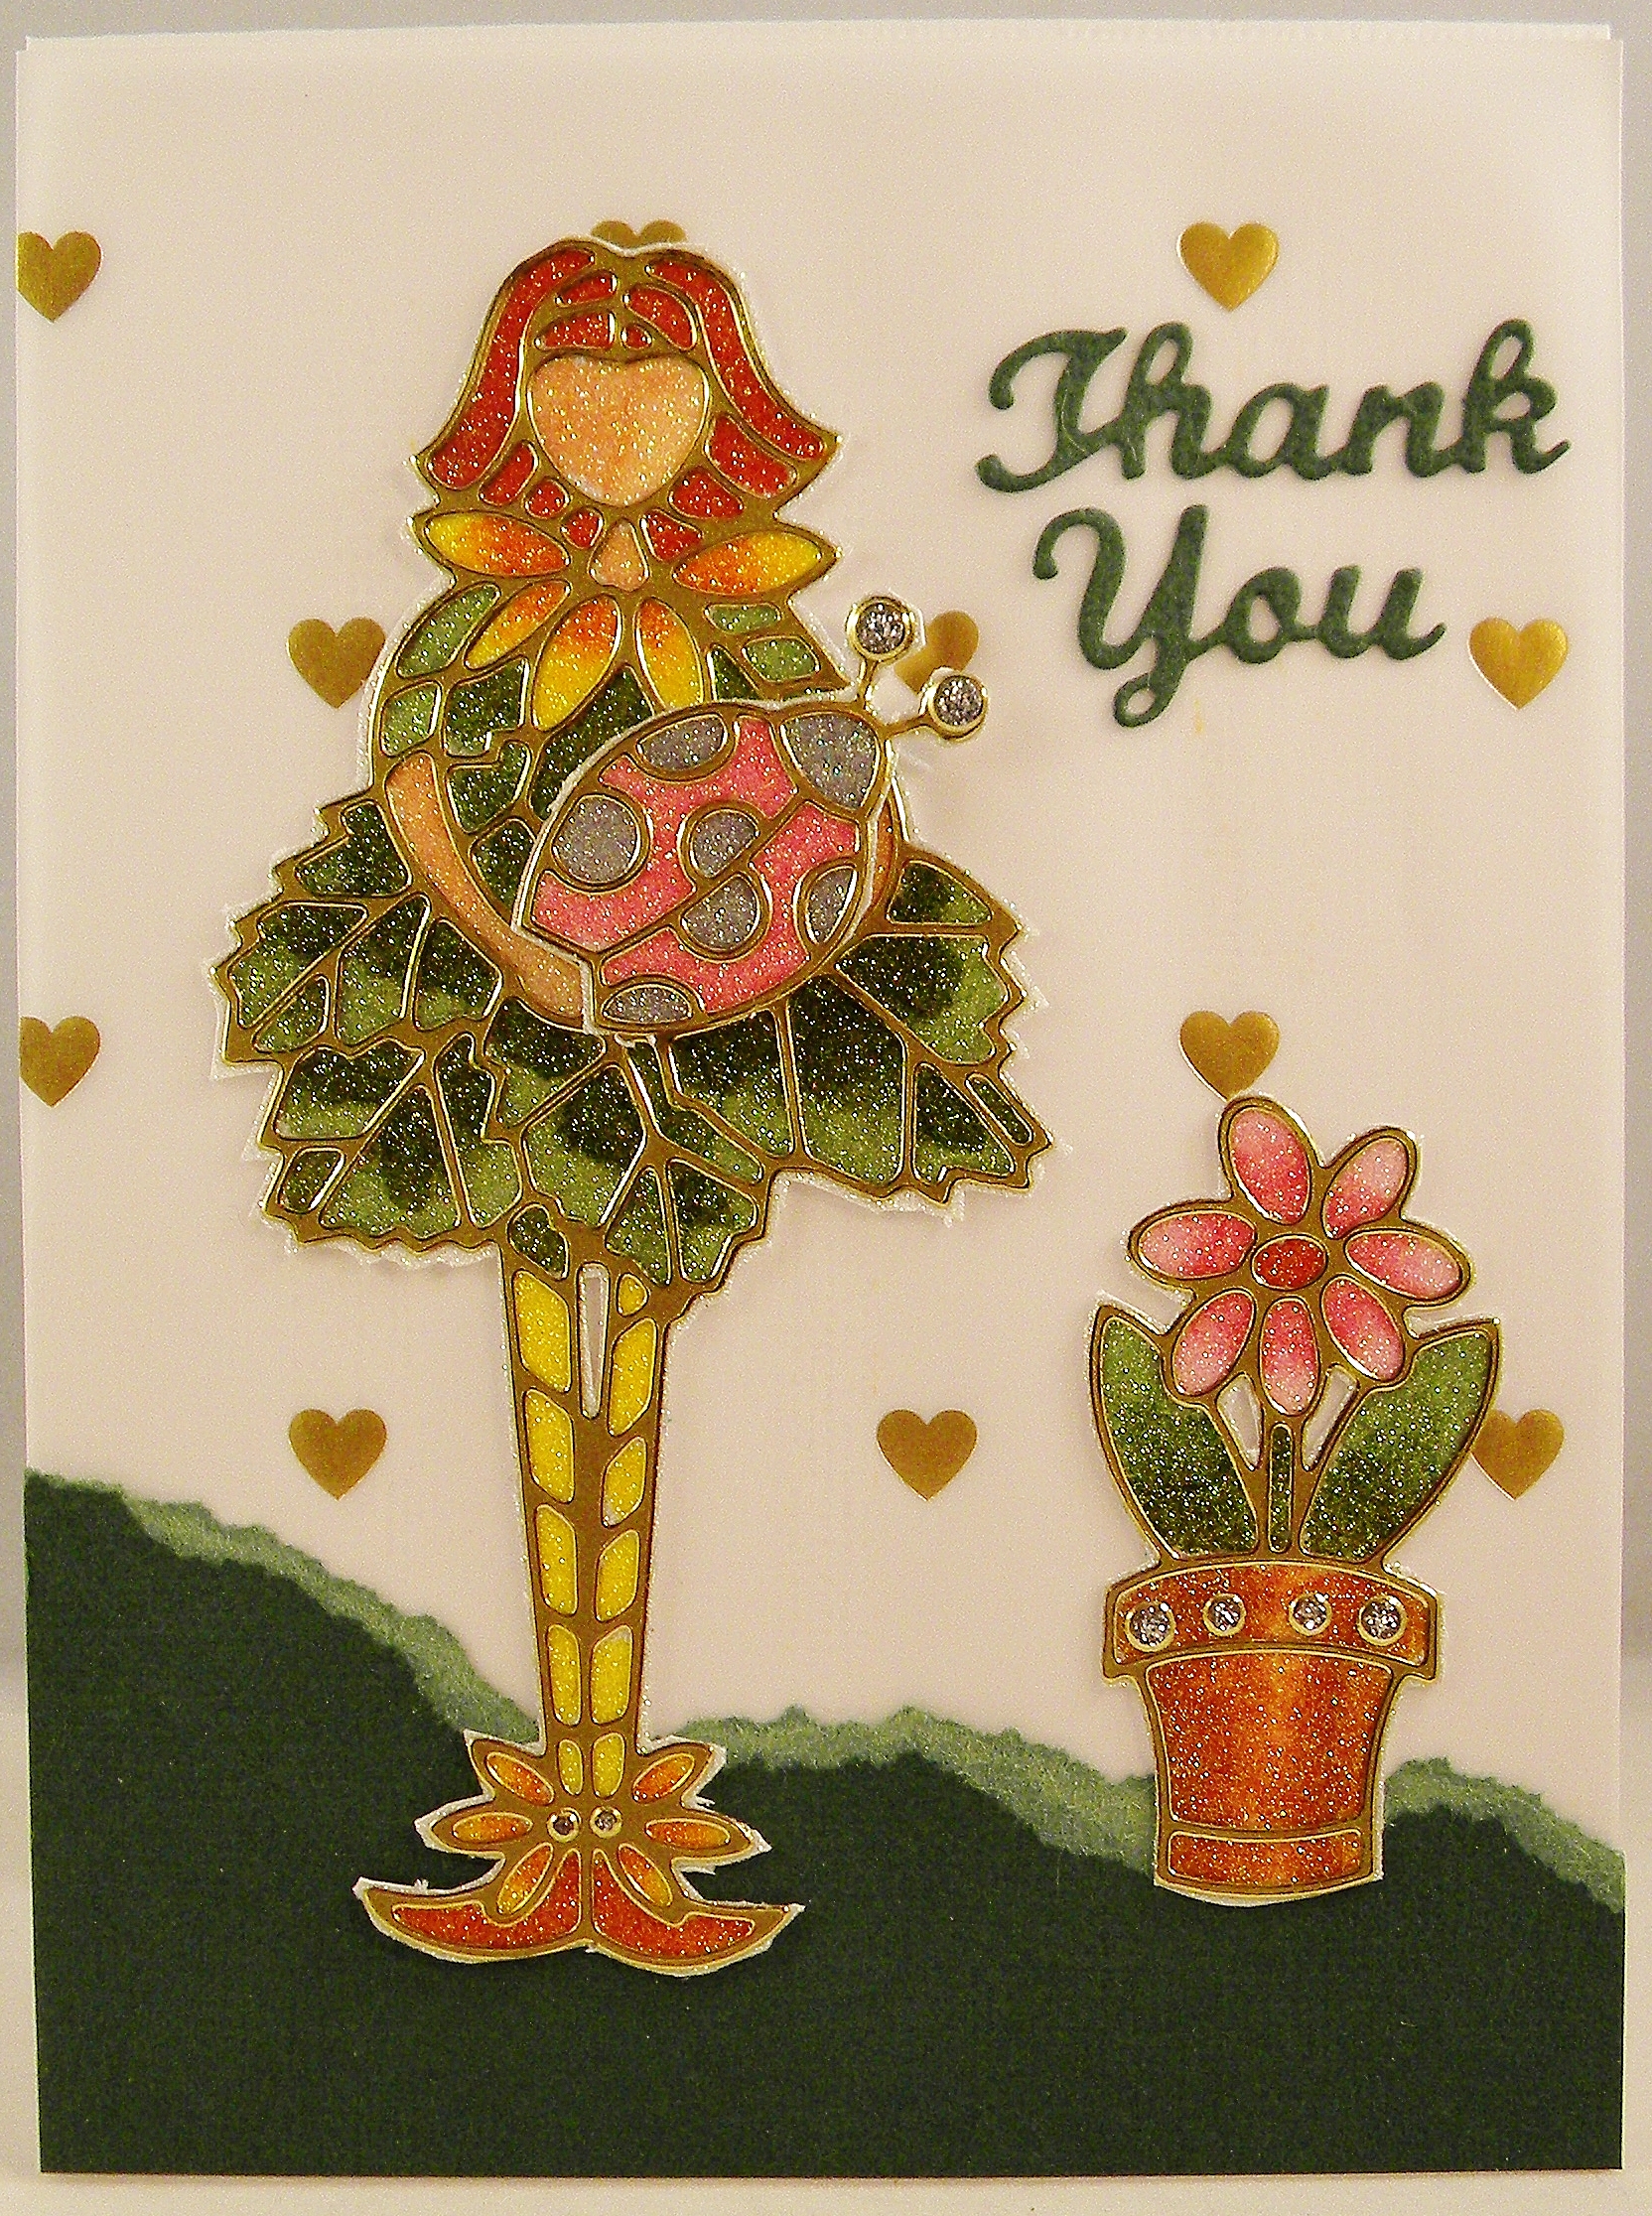
  12. Now you can trim the rectangle with a paper trimmer, like I did in the Happy Birthday card at the top, or cut it out with scissors, like I did the ornament card.

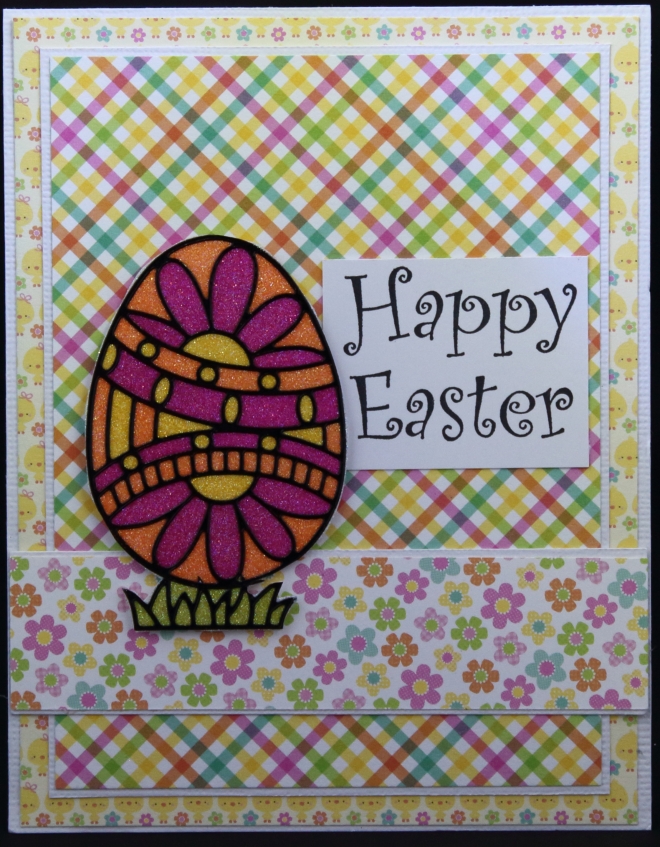
Add a few layers of cardstock and/or patterned paper and a sentiment to turn the colored sticker into a stunning card. Your friends will be amazed at how elegant and beautiful the card looks — much like a stained-glass window — and you will love how easy it is.

Give it a try … I’m sure you’ll love it!

December Birthday Card

ECD_DC_December_Candy_Spiegel3

My mother-in-laws birthday is just a few days before Christmas. Since my birthday is just a few days after Christmas, I know how unfair it can be. Birthday presents come wrapped in Christmas paper and often are Christmas decor.

This year, I wanted to give her a card that celebrated the season, but was not Christmasy.

003

I started by embossing gold Shimmer Sheetz in the Pinecones Elizabeth Craft Designs Embossing Folder.

ECD_DC_December_Candy_Spiegel

I used Elizabeth Craft Designs Transparent Double Sided Adhesive to adhere it to a card base. I cut another piece of Shimmer Sheetz and adhered it to piece of cardstock and then the card front.

ECD_DC_December_Candy_Spiegel2

Then I placed strips of Transparent Double Sided Adhesive across the card. I trimmed the edges, removed the backing and coated it with Amethyst Silk Microfine Glitter. I shook off the excess and polished it.

Then I added a Happy Birthday Peel Off to the front.

ECD_DC_December_Candy_Spiegel3

Simple, but elegant.

Visit the Elizabeth Craft Designs Blog to see more creations today!

Celebrate Fall

Sept_ECD_Candy_Spiegel

Welcome Fall! I love fall. It is one of my favorite times of year. I love those crisp, cool evenings and mild, sunny days. The sky seems bluer and the sun seems brighter in the fall. And then Mother Nature offers a generous treat as leaves turn orange, yellow and red. It is beautiful!

So, when we were asked to make a fall project for this month’s Elizabeth Crafts Designs’ Designers Challenge, I jumped at the opportunity to bring some of those fall colors into my house with a banner.

This banner uses BRAND-NEW TAG DIES from Elizabeth Crafts Designs. The dies come in pieces so you can make dozens of different tags out of the same set of dies. I chose to use Tags & More 3 — Leaves to make the banner.

The banners are easy to use and I wanted to give you step-by-step directions to show you how.IMGP0838 1. Cut cardstock 4×5″. Tape outer die onto cardstock with removable tape (I use Washi Tape). Run it through die-cutter.IMGP0839 2. Remove first die and lay on leaves die — matching holes and making sure it is even. Tape it down and die cut it.IMGP0841 3. Use scissors to trim the edge of the die-cut portion off. Then use a paper trimmer to make the rest of the tag the same width. With this system, the tag can be any length.

IMGP0842 4. Use the circle die (included in the package) to cut holes on each side of the tags. This is where they will attach to each other.

IMGP0843 5. To create a back panel to provide color behind the leaves, cut a piece of cardstock (or paper) 4×2″. Tape the curved die and die cut it. Then adhere it to the back of the tags.

IMGP08466. Use a variety of colors and patterns to repeat the tags, so they look like this. (I used paper from Doodlebug’s new fall line Friendly Forest).

IMGP0895

7. Cut out a variety of photo corners, flowers and leaves from the die set and adhere as shown. I also added some strips of paper. Coat fall Peel-Offs with Elizabeth Craft Designs Silk Microfine Glitter and color with Copics. Cut out designs and adhere as shown.
IMGP0896

8. I painted chipboard letters and included those, as well. I used brads to cover the hole in the flowers, but you could also paper or a gem.

IMGP0905

9. Tie tulle (May Arts) to first and last tags at the top. Also use it to connect each of the tags together.

IMGP0906

10. I decided to go back to my finished banner and add hangers. I used a Crop-A-Dile and decorative eyelet, but you could also use the circle die to make the holes, if you did it before the tags were all decorated. Then, attach twine (May Arts) to the tags to serve as hangers.

Here’s another look at my completed banner … I love it!IMGP0909


Published!

I was delighted to be included in an article in June’s edition of Scrapbooking.com magazine!

ECD_giftbag_by_Candy_Spiegel

Here’s the project I did … I started with an inexpensive gift bag (.53 tax included at the dollar store). I applied a little cardstock and then used Peel-Off Stickers, Silk Microfine Glitter and double-sided adhesive from Elizabeth Craft Designs. I colored the glitter with Copic markers and ta-da! A beautiful gift bag that your family and friends will love!

Of course, there are some other inspiring projects by some of my designer friends in the same issue. Please click here to check it out …

I’m off to try that candle technique shown in the article!

Flower Cuties Fun

The May Designers Challenge at Elizabeth Craft Designs is to create a standard-size “flat” card — one that does not use the fabulous accordion or pop-up dies Elizabeth Craft Designs is known for.

Frankly, I love to make flat cards because I mail them and I get tired of having to pay extra to mail thick cards.

Here’s the card I created ….

ECD_MAY_Candy_Spiegel

This one uses the the new Flower Cuties Peel-Off stickers, the Thank You die, Glitter Dots and Silk Microfine Glitter from Elizabeth Craft Designs; cardstock from American Crafts; vellum paper from Stampin’ Up and Copic markers.

016

I started by covering the Peel-Offs in Silk Microfine Glitter and then coloring them with Copic markers.

014

I created the card base and attached the vellum (I hid the adhesive behind the images.) I added a torn piece of cardstock for grass.

Then I cut out each piece and applied them to the card.

I took one of the extra ladybugs and used dimensional foam adhesive to attach it on top of the one the little girl is holding. The second one I placed on the inside of the card.

ECD_MAY_Candy_Spiegel

Then I added Glitter Dots to the antennae, floral ankles and flower pot. I think they add a cute touch.

Finally, I cut the sentiment out of cardstock with a die. I think she turned out pretty cute … what do you think?


Designer’s Challenge: White & Elegant

ECD April by Candy SpiegelThis month, our challenge from Elizabeth Craft Designs was to create a project that was white and elegant.

The minute I heard the theme, I knew what I was doing … it was a card I had mentally designed when I first saw the Flower Mosaic embossing folder from Elizabeth Craft Designs.

ECD April by Candy Spiegel2I started with a sheet of ECD Velvet Adhesive, cut it to size, and ran it through my Big Shot in the embossing folder.

ECD April by Candy Spiegel3

Then, I used my Crop-A-Dile Corner Chomper to round the edges.

ECD April by Candy Spiegel4

I placed it onto Gold Shimmer Sheetz and used the Corner Chomper again. Then I attached it to the card and rounded the bottom corners on the card.

Next, I began adding Glitter Dots in Silver/Gold to the centers of each of the flowers on the embossed design.

ECD April by Candy Spiegel5

I took some leftover pieces of the gold Shimmer Sheetz and cut out the center of the dragonfly (Elizabeth Craft Designs die). I then cut out both the wings and the overlay with vellum. I cut off the antennae off of the vellum overlay dragonfly so the gold antennae would show.

ECD April by Candy Spiegel6

I used a glue pen to adhere the vellum overlay and the wings to the Shimmer Sheetz body. I only used glue on the body, so the wings would be free to move.

ECD April by Candy Spiegel7

Here’s how the card looks with the dragonflies on the background.

ECD April by Candy Spiegel8

I added a sheer ribbon around the front of the card and knotted it. I used a Mini Glue Dot under the knot to hold the ribbon in place.

ECD April by Candy Spiegel9

As a final touch, I added a silk flower. I filled the center of the flower with Elizabeth Craft Designs Silk Microfine Glitter in Fire Opal.

ECD April by Candy Spiegel

I love all of the glitter and sparkle in this card. The gold raises the elegance level and the embossed velvet is so soft and sophisticated. What do you think?

You can see all of the designer’s projects on the last day of April, here.