A Deer for Christmas

deer_candy_spiegel

Since I was a little girl, I often dreamed of having an old-fashioned cabin with a deer hanging above the fireplace. That dream has changed a bit, but it has never gone away. I still love taxidermy and would welcome many creatures into my home.

Then, it became “hip” to hang white porcelain deer on the wall. Of course, I was in love with the idea. My husband, on the other hand, hated the idea. Since I want us both to be happy and comfortable at home, I backed off of my idea.

But this year, I decided I was going to do something to make me happy — regardless of what he thought.

img_3433

I bought an inexpensive paper-mache deer head and spray-painted it.

img_3447

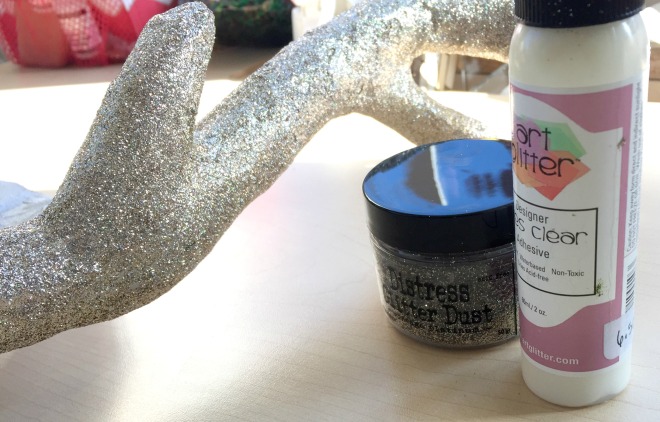
Then I painted the antlers with Designer Dries Clear Adhesive and then coated it with Distress Glitter Dust. It created a bit of a mess, but it was easy. Besides, everyone needs to sparkle during the holidays!

deer_candy_spiegel2

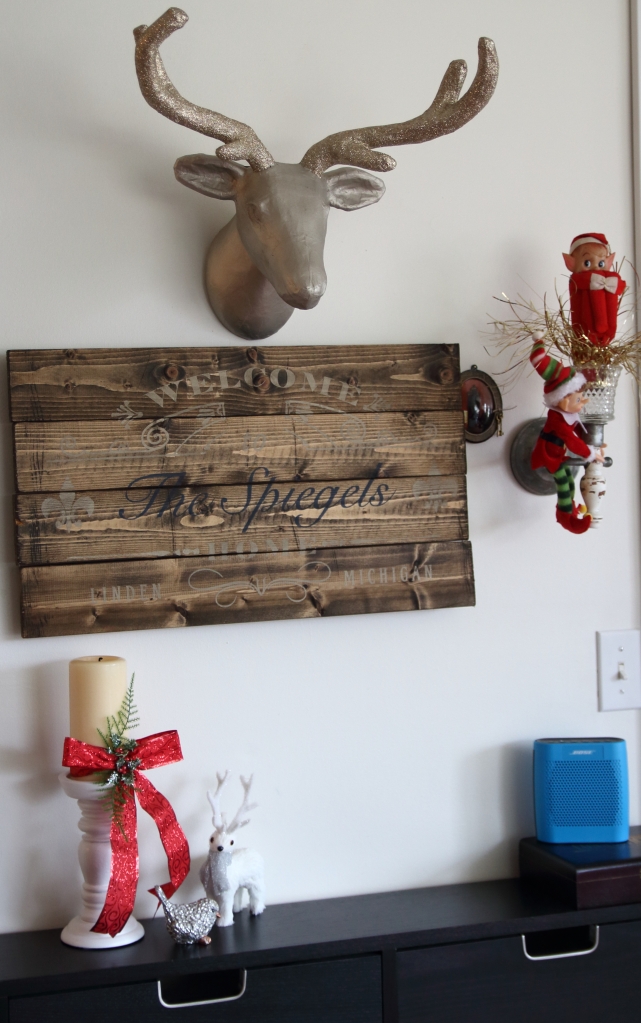
Mounting the deer was a bit of a challenge, but we finally decided to use Command Strips and they seem to be holding.

I love how it turned out. It looks really great hanging in the living room. Great enough that I might leave it up after the holidays for a bit of bling all through the winter.

Blankets for Christmas

blanket_candy_spiegel

Working at Jo-Ann Fabric and Crafts, I have found myself unable to resist the beautiful fleeces the store sells. And, since I have lost 80 pounds, my internal temperature has been thrown off and I often find myself cold — especially if I sit and work on the computer, read or watch TV.

So, I took advantage of buying some fleece on Black Friday and prepared to make myself a blanket.

I found this blog post for the directions …

The plaid is the Luxe fleece … the deer is Blizzard fleece. Both are soft, but the Luxe is amazingly soft!

Since I gave Matt a new sewing machine for Christmas, I let him actually sew my blanket for me. He did a beautiful job and it is amazing! I absolutely love it. It is so warm and cozy and has just the right weight. And, it looks great in my living room.

blanket_candy_spiegel3

I figure everyone should have one, so I’ve been keeping him busy making blankets for gifts! They are still homemade and designed by me, so that still counts, right?!

A Banner of Joy

joy_candy_spiegel3

Yesterday, I showed you my barn wood tree … one of the items on the tree is a Joy banner I made this year. Here’s how I did it …

joy_candy_spiegel7

I started by cutting some paper out with the Tim Holtz Postage Stamp Die. Then I scored the top and folded it down, so I would have something to attach to the ribbon.

joy_candy_spiegel8

I used other Tim Holtz dies to cut out the poinsettias, letters and ovals. Then I trimmed a few bits of paper from the stack I bought and added it to the front of each piece of the banner.

joy_candy_spiegel

I added Scor-Tape to the  backs of each one so I could adhere the ribbon, as shown in the photo above.

joy_candy_spiegel2

Here’s the finished banner …

joy_candy_spiegel6

… and here it is hanging on my barn-wood tree.

O’ Christmas Tree

joy_candy_spiegel3Christmas is coming a little slowly this year … mostly because I started a new job and even though it is only part time, it has thrown quite a wrench in my schedule.

Christmas is my favorite time of the year. I love the music, the lights, receiving Christmas cards, finding the perfect gifts and making some as well. The one thing I hate is being stressed or feeling like I have to do something. Those feelings are coming on strong, so I am starting to scale back a bit … letting some things go so I can continue to enjoy the season. One thing I have given up on is the tree. I decided since it is still in the box and I have way too many other things to enjoy, I will just leave it there.

I did hang some of my favorite ornaments — the ones with a bit of red in them — on the tree my husband made me from barn wood. This tree lives in my house all year long. I change out the decorations for the season and also include photos and cards from others. And, although I was so busy, I completely missed fall, I did manage to put some special touches on it for Christmas.

I started with picking up a wooden star at Michael’s. I painted it with Distress Paint and hung it above the tree. Then, I added some store-bought garland and my the first card I received this year — from my friend Marilyn.

joy_candy_spiegel5

I think it turned out pretty good … what do you think?

Give Thanks

give_thanks_candy_spiegel2

I know, I know … I’m not ready for fall either, but if we need to get fall out of the way so we can make holiday gifts!

This sign is actually a class I took at Green Door Studio in Brighton. The wood was already stained … we just had to distress it and paint it. The painting technique is really cool — it doesn’t use stencils but is not quite freehand, either. It’s a great technique that you have to take the class to learn.

givethanks_candy_spiegel

This is the sign I came home with. I wasn’t quite happy with my painting skills so I sanded it — a lot — with fine sandpaper. You can see the sanding in this photo — Misty decided she needed to model the sign, by the way.

give_thanks_candy_spiegel3

I wanted to add more because I am just not plain and simple, so I created some flowers. I didn’t have any fall-themed paper, so I cut out orange cardstock using my Tattered Florals die from Tim Holtz.

Then, I used a background stamp and Archival ink to create a pattern.

give_thanks_candy_spiegel4
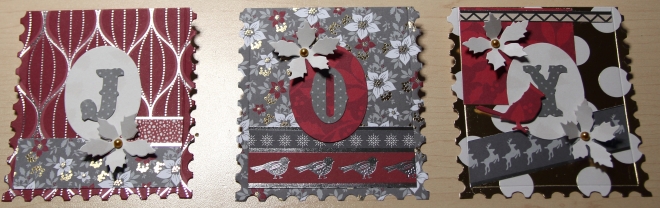
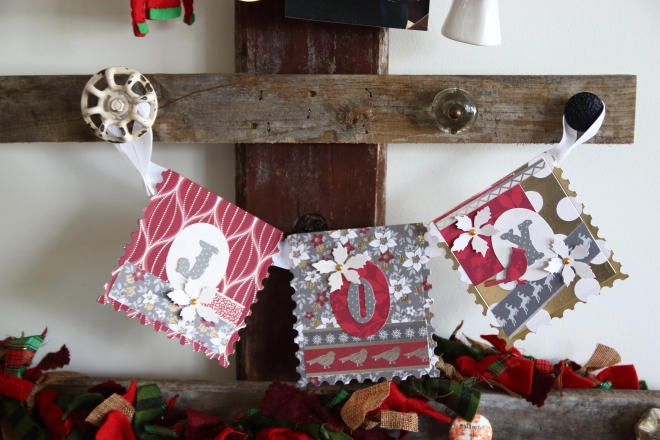
A little Distress Ink and some flower shaping and a button in the middle and they were all set!

give_thanks_candy_spiegel2I also added some hooks and a ribbon to the top to hang it. I love how it turned out!

This class is still being offered this fall at Green Door Studio. Click here to contact the store for details.

Dance Like No One Is Watching

dancemirror_etchall_Candy_Spiegel3

So, I found this little mirror in the clearance section at Michael’s one day and knew it would be perfect for an etchall® etching creme project.

And it is!

My problem is photographing it … I tried inside, outside, in light, little light … nothing would work. I wasn’t going to share this project, because I couldn’t photograph it, but it was so fun to make — and, I think, perfect for a little girl’s room, bathroom or foyer — that I decided to share my horrible photos, but fun techniques with you.
etchall_mirror_candy_spiegel

I started by designing the quote on my tablet using Cricut’s Design Space app. Then I used the Cricut to cut out the words using etchall® etchmask.

Next, I adhered the  etchall® etchmask transfer sheet to the surface so I could pick up the little dots in the “e” and other letters.

etchall_mirror_candy_spiegel2
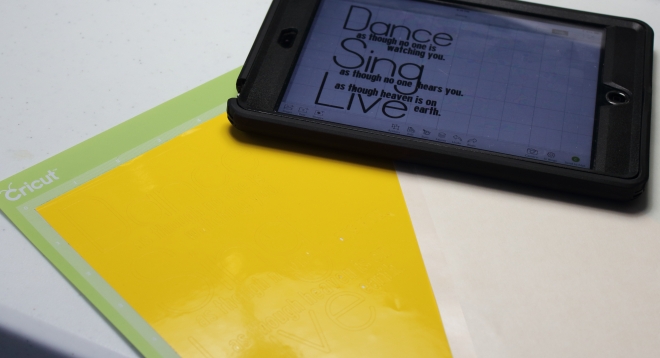
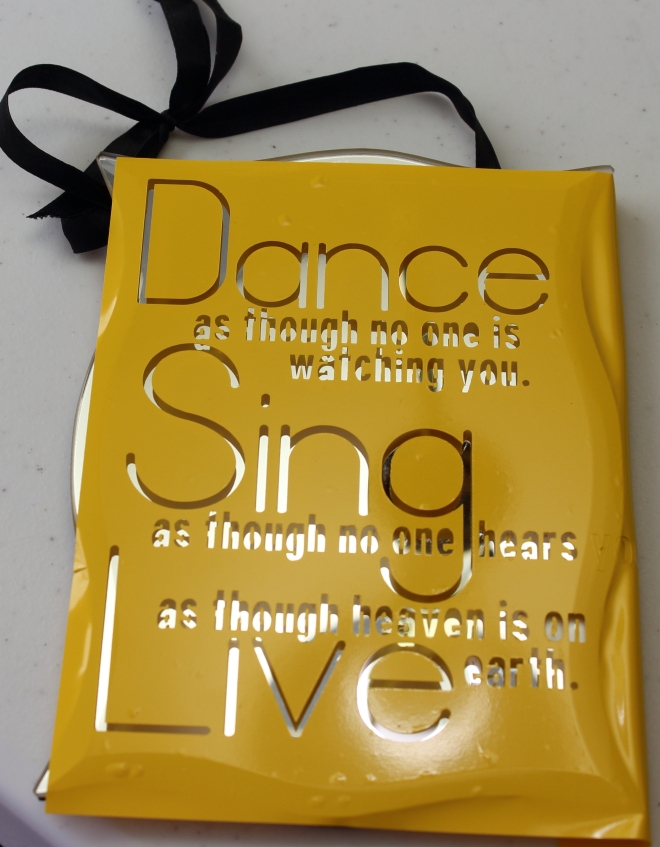
I then pulled the etchmask off of the Cricut mat and placed it on the mirror.

Then, I coated the surface with etchall® and let it sit for 15 minutes. Then, I scraped up the etchall® and placed it back into the bottle for another time. I rinsed off the mirror, removed the etchmask and gave it a final cleaning and it was done!

dancemirror_etchall_Candy_Spiegel2

It really is crisp and clear, but I couldn’t get the letters to not reflect in the photo — unless I focused on something in the mirror and then you couldn’t see the letters. So, trust me when I say it is perfect and crystal clear in person!


Commissioned Art

window_Candy_Spiegel

For years, I have been looking for a special piece of artwork for my living room wall. I fell in love with a huge canvas photo in an art gallery and dreamed I would someday take a picture and have it mounted. So far, that hasn’t happened and I was anxious to get something on the wall. So, I decided to commission myself to make a piece of art.
window_candy_spiegel

I started with a large, 6-pane window I bought at Green Door Studio. I washed it up, but left the white paint just as it was.

window_candy_spiegel1

I added metallic silver paint to the majority of the window.

window_candy_spiegel2

Next I added a bit of blue paint here and there …

window_candy_spiegel3

And then some brown. Then I went over the top of the entire window with a semi-gloss glaze mixed with brown paint. Then I was ready to decorate …

window_candy_spiegel4

I used a Wendy Vecchi Studio 490 rubber stamp to add some text to two of the corners. Archival Ink works well — I heated it just to be sure.

window_candy_spiegel6

Then I went over the top with Texture Paste on a stencil.

window_Candy_Spiegel1

I added a bit of paint over the top …

window_Candy_Spiegel3

I used the same techniques in the opposite corner, but I added Lake Superior rocks and a bit of birch bark to that corner.

window_candy_spiegel7

In the center of the panes, I used a stencil to add a compass with Archival Ink.

window_Candy_Spiegel6

Then I added the photos behind the glass. I used Mini Glue Dots because I wanted to be able to change them out. I don’t like that the dots show in some places, but I really wanted the photos behind the old glass.

window_Candy_Spiegel5

I also added a few tags, some wood pieces and more rocks to various spots on the window.

window_Candy_Spiegel7

At the bottom, I added a piece of driftwood from the beach, along with a few more rocks.

window_Candy_Spiegel4

I also added a charm from Tim Holtz.

window_Candy_Spiegel

I love how my window came out. I hope I’ve inspired you to make art of your own!

Etched & Altered Frame

etched frame

I receive lots of comments about my etched art, so I decided to teach it!

In this class, we will alter an 8″x10″ wooden picture frame with acrylic paint and alcohol. Then, we’ll add the word “beautiful” to the glass with etchall® etching creme.

This class is offered at Green Door Studio in Brighton on Friday, Aug. 12 at 11 a.m. You must register for this class so I have enough frames. Click here for details.

Hope to see you there!

Etched Shadowbox

etchall_shadow_Candy_Spiegel5

I created this shadowbox to showcase our new love of rock hunting. I included a map of the area (although it ended up getting mostly covered up), some of the rocks we collected and photos from our vacation. But this idea would work with any theme — memories from a wedding, birthday celebration, anniversary or any special event. And, with etchall etching creme, you could include names, dates and other things on the front glass. For my piece, I used the word “found”. Here’s how I did it …

etchall_shadow_Candy_Spiegel6

I started with a shadowbox from a big box store.

etchall_shadow_Candy_Spiegel7

I adhered a map of the area to the base of the shadowbox. I used glaze and paint to calm down the bright colors a bit.

Then, I used stencils, pastes and inks to create the background. I added photos and rocks and then put the shadowbox back together.

etchall_shadow_Candy_Spiegel

I took a piece of etchall etch mask and used my Big Shot to die cut the word “found” from a Tim Holtz die. Etch mask is stronger than the vinyl sold for electronic cutting machines, which means it doesn’t tear and is easier to work with. But, I used a Thinlits die and it cut like butter!

After pulling out the word from the etch mask, I peeled off the backing and stuck it to the glass. Then, I carefully replaced the inside of the o, d and f. I used the etchall Squeegee to make sure everything was well adhered and to remove any air bubbles.

etchall_shadow_Candy_Spiegel2

I taped off the edges and poured on the etchall etching creme. Then, I set a timer for 15 minutes and walked away.

When I came back, I scraped the etchall etching creme back into the container (it’s reusable!) and then wiped away any residue and removed the mask and tape.

etchall_shadow_Candy_Spiegel4

I love how the word seems to float because it is on the front of the glass and the other elements are at the back of the shadowbox.

etchall_shadow_Candy_Spiegel3

This is the perfect way to remember our trip rock hunting!

Exploring Alcohol and Acrylic

explore_Candy_Spiegel1

I recently learned a technique using acrylic paint and rubbing alcohol and I have been having so much fun with it, I thought I would share it here …

explore_candy_spiegel

I found these little wooden panels on sale at Michael’s and thought they would be good to try this technique on.

explore_candy_spiegel2

  1. Paint randomly with multiple colors. I used Distress Paint in blue and green. When they start to blend, stop and clean the brush and then go again. If they mix too much, dry and then add a bit of color back in.
  2. explore_candy_spiegel3
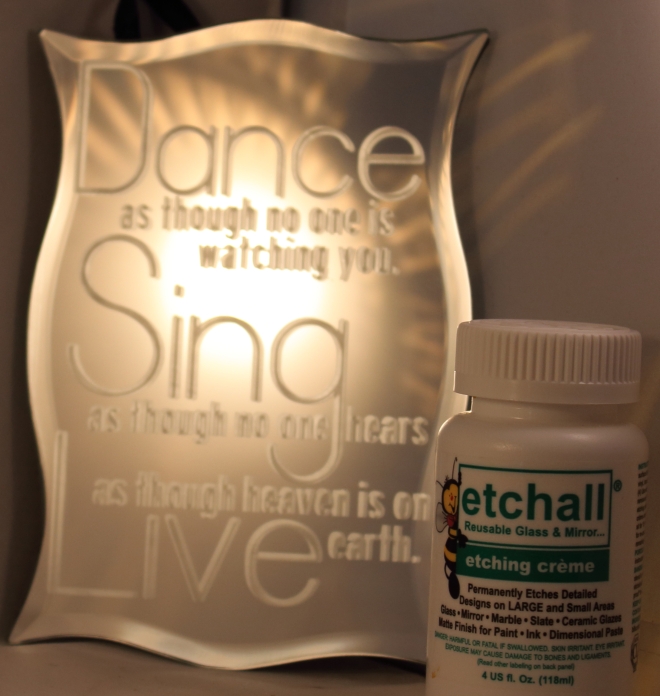
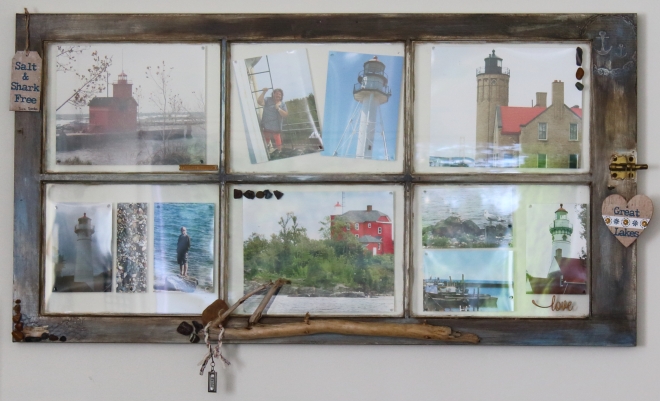
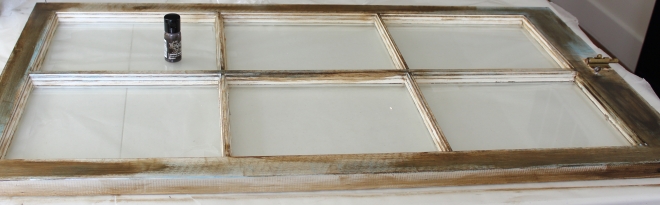
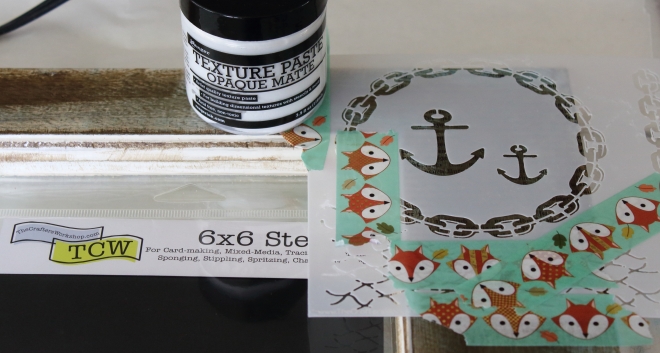
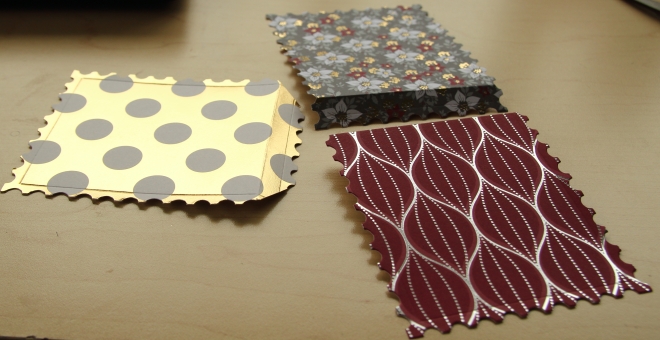
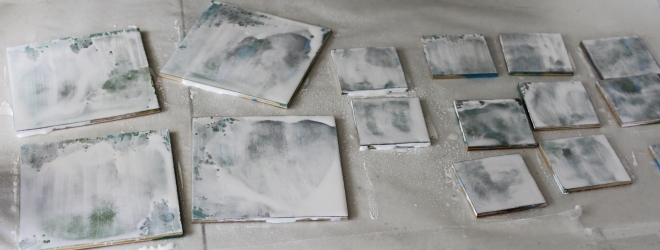
When dry, cover with white paint. I used Dylusions paint. This is a very fluid paint that dries quickly and it worked a bit too well … It didn’t cover as completely as I had hoped and the alcohol obliterated it in places. Next time, I will use a standard acrylic paint. While still wet, spray with rubbing alcohol. Let sit for 5 minutes and then use a baby wipe to remove portions of the white paint, allowing the other colors to show through.
  3. explore_candy_spiegel4
    Because of the properties of the Dylusions paint, I had little to take off … it almost fell off. In some places, I used a dry paper towel to blot the alcohol off and then heat dried it.
  4. explore_candy_spiegel5
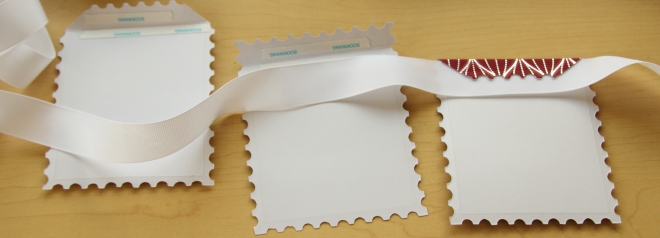
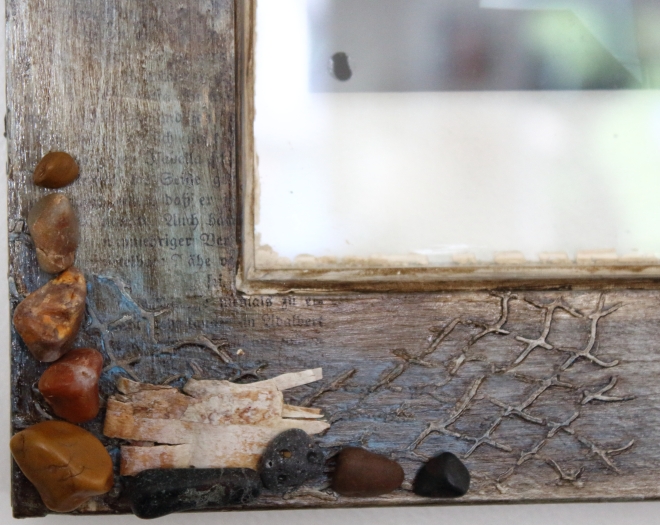
Use a glazing medium to adhere Finnabair Mica Flakes.
  5. explore_candy_spiegel6Mix glazing medium with Perfect Pearls (I used green) and cover each piece.
  6. explore_candy_spiegel7
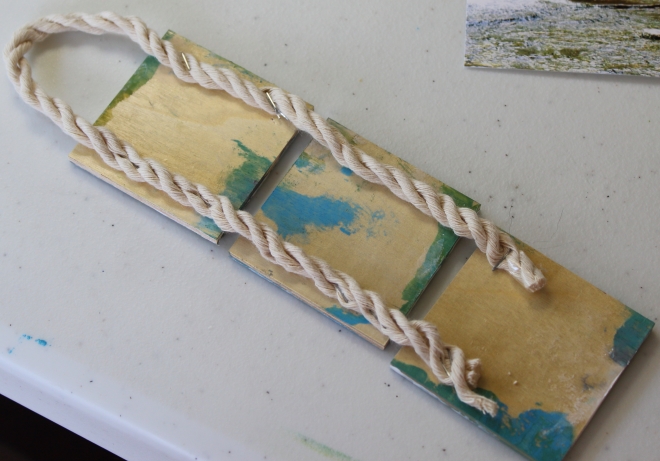
Use Tiny Attacher to staple rope to the blocks to make a banner or hanger.
  7. explore_candy_spiegel8I added a photo and hung this one on my tree.
  8. explore_candy_spiegel9Cover chipboard letters with two coats of enamel powder and one coat of UTEE.
  9. explore_Candy_Spiegel1Decorate with photos, twine and rocks taken from the beach!