
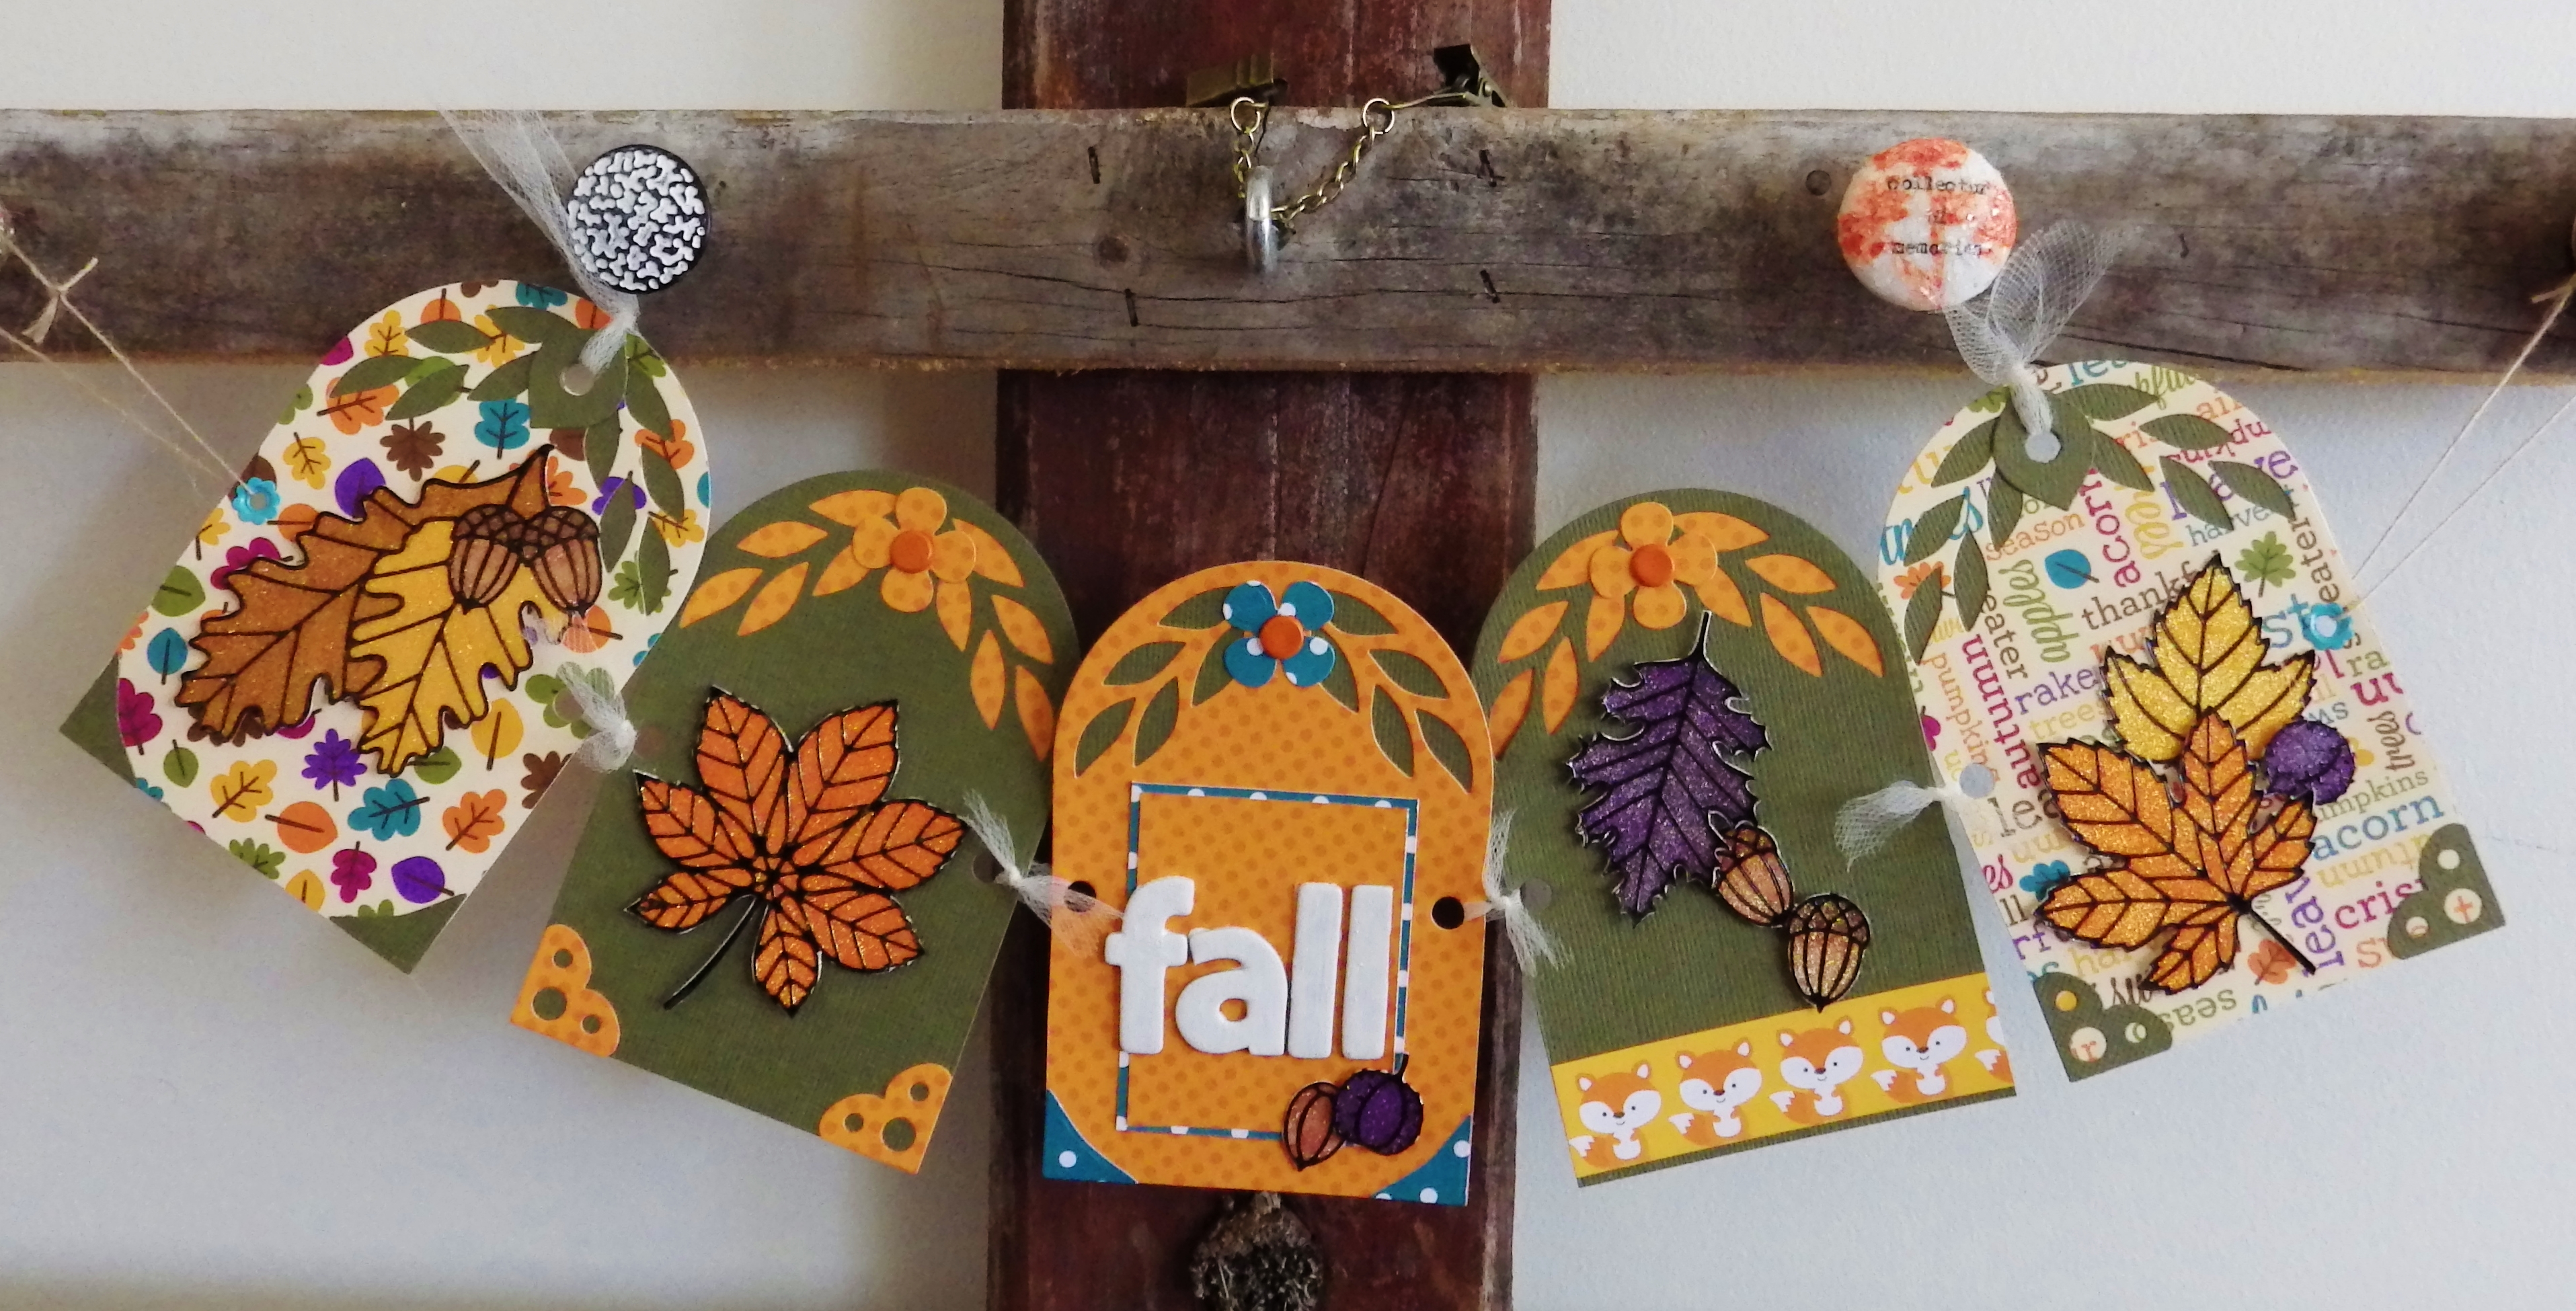
Welcome Fall! I love fall. It is one of my favorite times of year. I love those crisp, cool evenings and mild, sunny days. The sky seems bluer and the sun seems brighter in the fall. And then Mother Nature offers a generous treat as leaves turn orange, yellow and red. It is beautiful!
So, when we were asked to make a fall project for this month’s Elizabeth Crafts Designs’ Designers Challenge, I jumped at the opportunity to bring some of those fall colors into my house with a banner.
This banner uses BRAND-NEW TAG DIES from Elizabeth Crafts Designs. The dies come in pieces so you can make dozens of different tags out of the same set of dies. I chose to use Tags & More 3 — Leaves to make the banner.
The banners are easy to use and I wanted to give you step-by-step directions to show you how.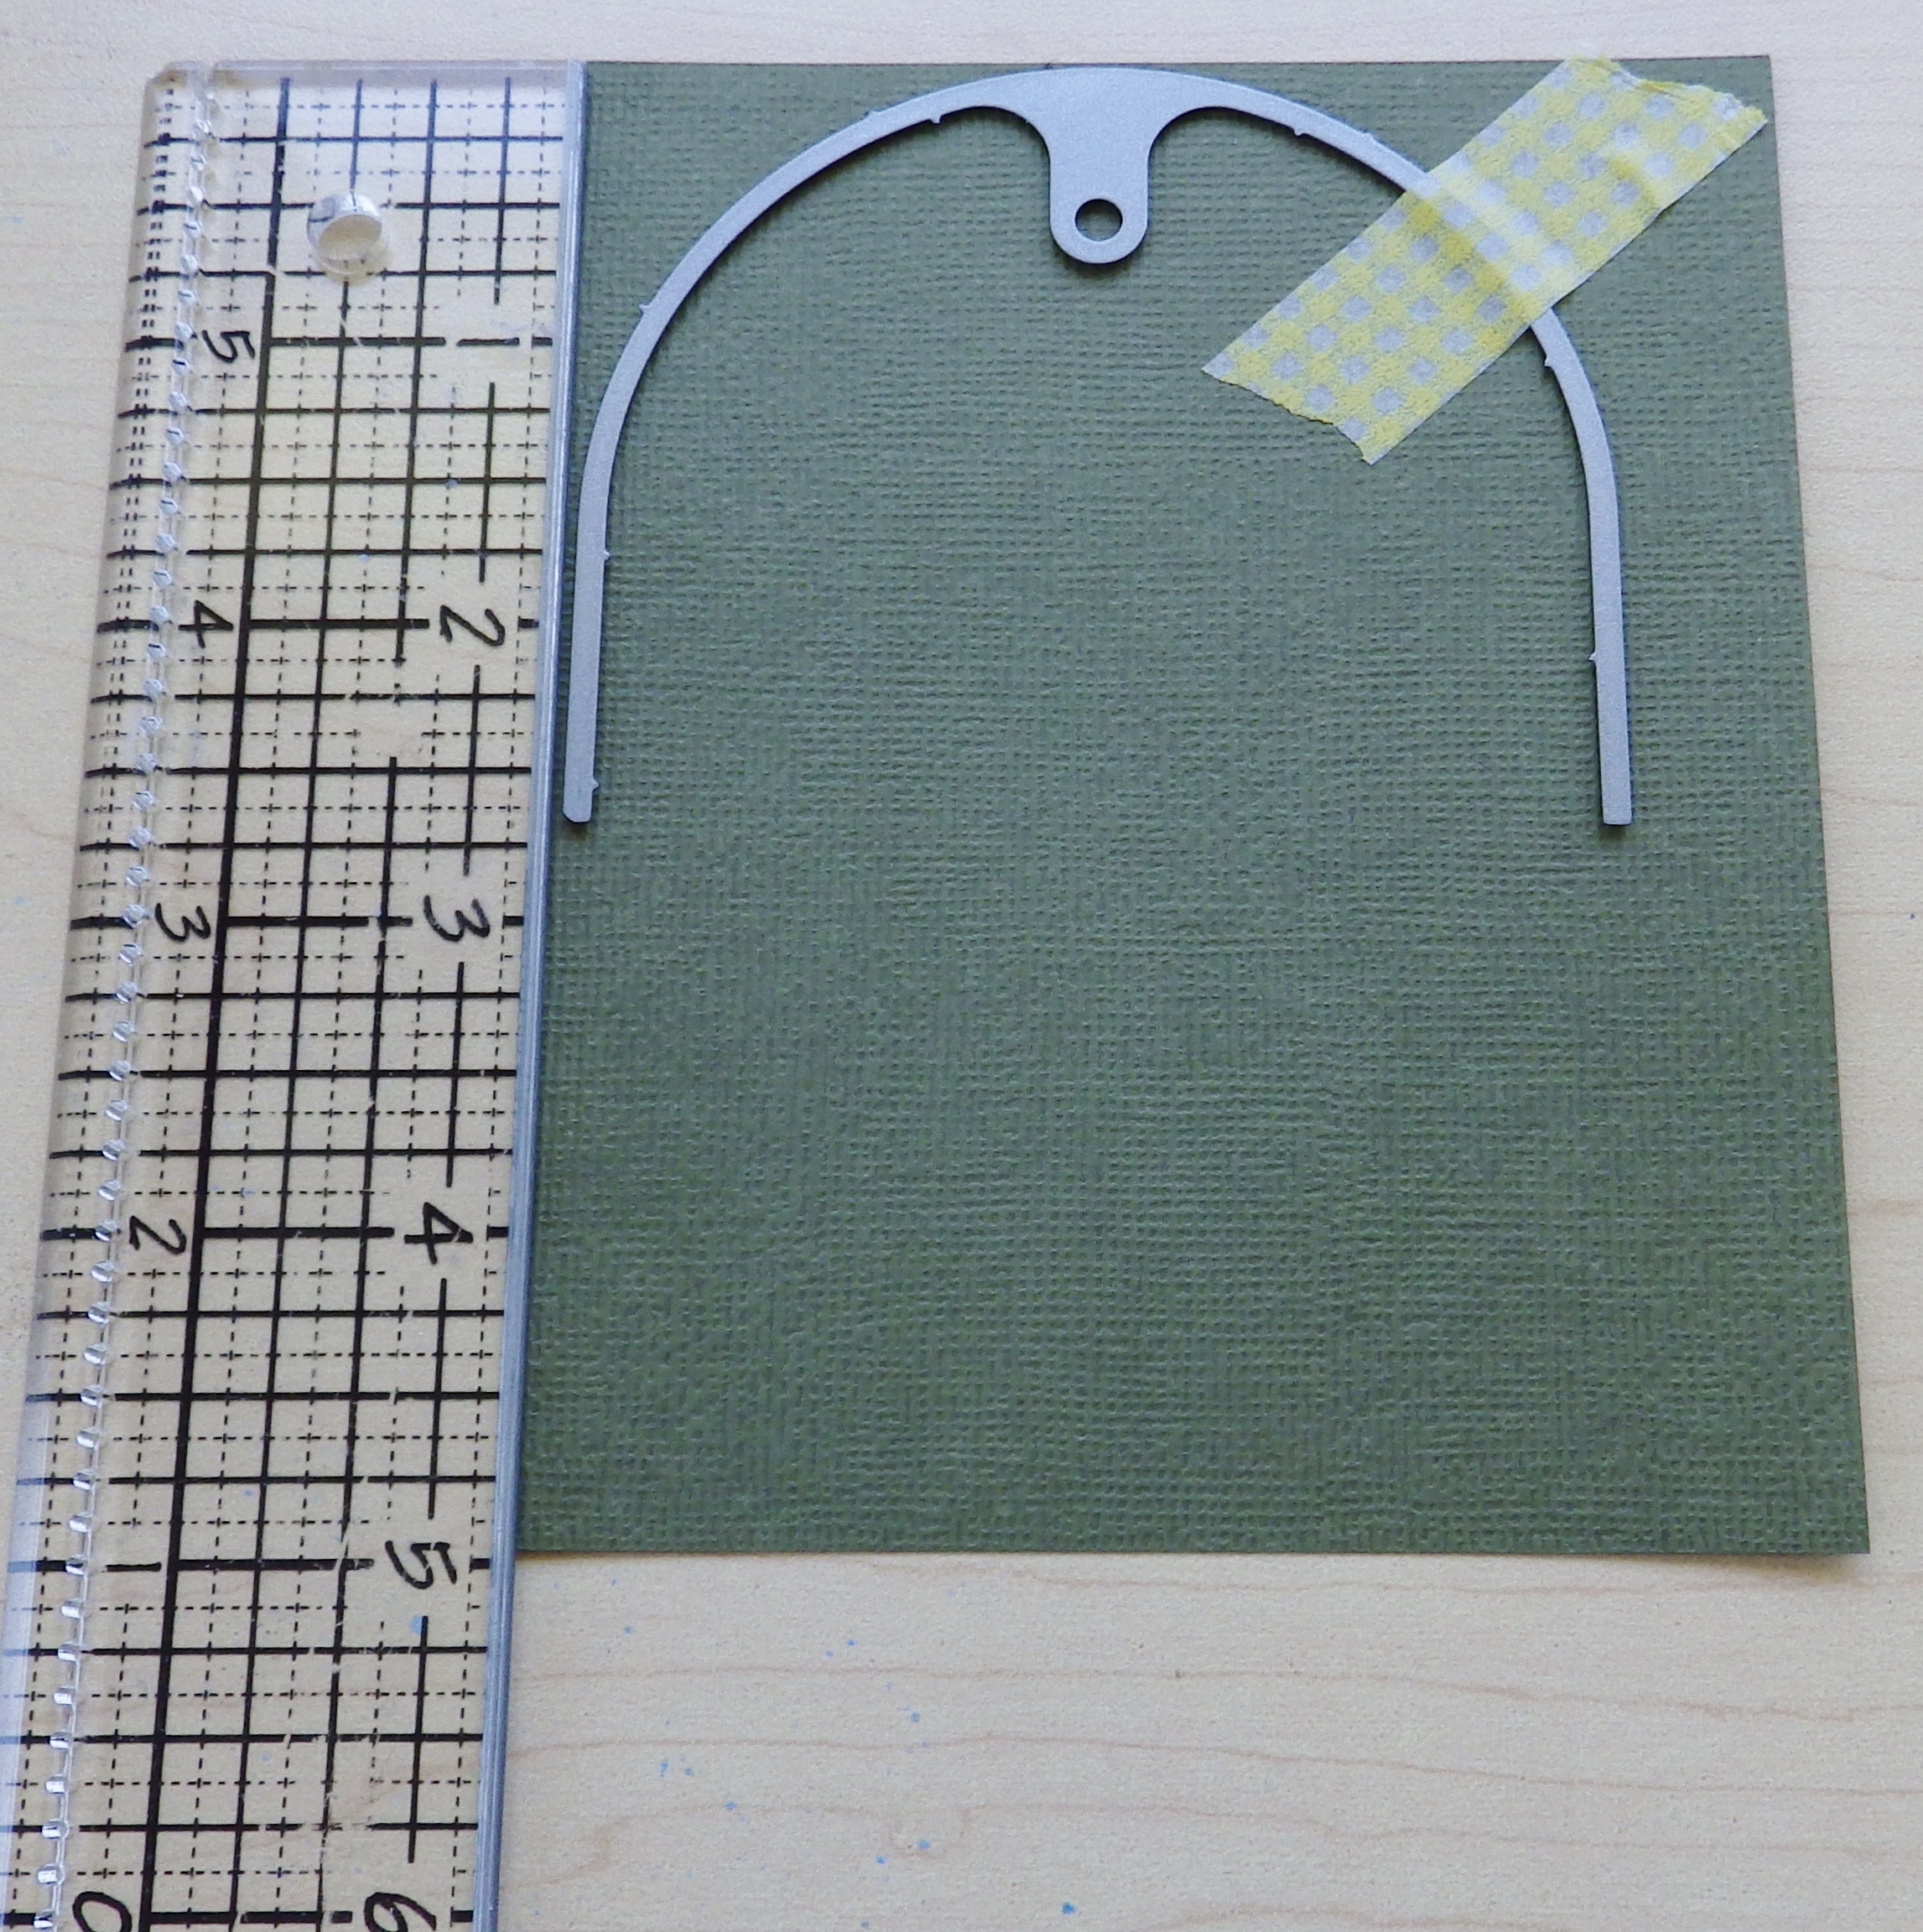 1. Cut cardstock 4×5″. Tape outer die onto cardstock with removable tape (I use Washi Tape). Run it through die-cutter.
 2. Remove first die and lay on leaves die — matching holes and making sure it is even. Tape it down and die cut it.
 3. Use scissors to trim the edge of the die-cut portion off. Then use a paper trimmer to make the rest of the tag the same width. With this system, the tag can be any length.
 4. Use the circle die (included in the package) to cut holes on each side of the tags. This is where they will attach to each other.
 5. To create a back panel to provide color behind the leaves, cut a piece of cardstock (or paper) 4×2″. Tape the curved die and die cut it. Then adhere it to the back of the tags.
 6. Use a variety of colors and patterns to repeat the tags, so they look like this. (I used paper from Doodlebug’s new fall line Friendly Forest).

7. Cut out a variety of photo corners, flowers and leaves from the die set and adhere as shown. I also added some strips of paper. Coat fall Peel-Offs with Elizabeth Craft Designs Silk Microfine Glitter and color with Copics. Cut out designs and adhere as shown.

8. I painted chipboard letters and included those, as well. I used brads to cover the hole in the flowers, but you could also paper or a gem.

9. Tie tulle (May Arts) to first and last tags at the top. Also use it to connect each of the tags together.

10. I decided to go back to my finished banner and add hangers. I used a Crop-A-Dile and decorative eyelet, but you could also use the circle die to make the holes, if you did it before the tags were all decorated. Then, attach twine (May Arts) to the tags to serve as hangers.
Here’s another look at my completed banner … I love it!
